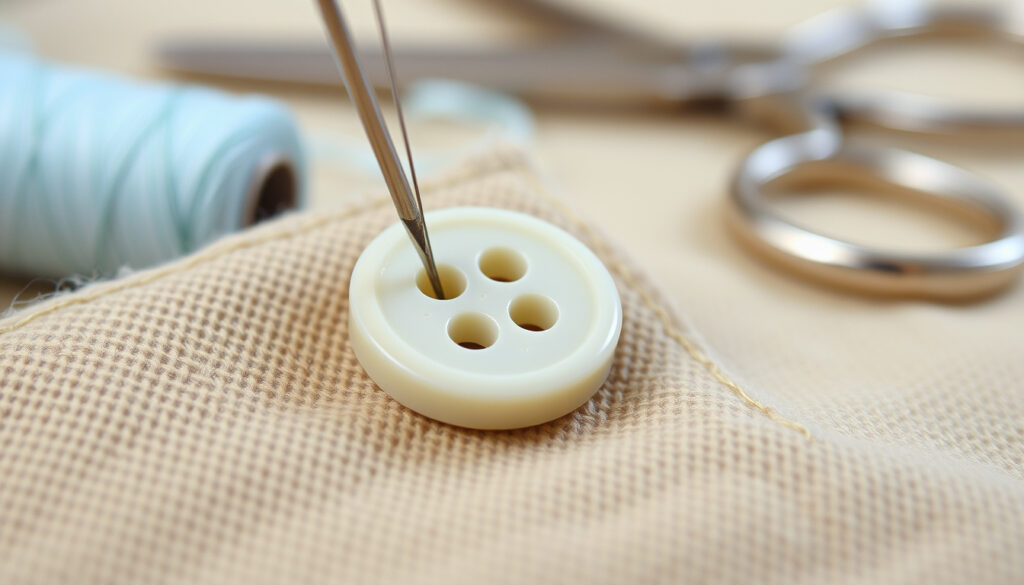
How to Sew a Button: Step-by-Step Guide for Beginners
You’ve got a button dangling by a single thread — or worse, it has rolled under the dresser. Don’t worry: learning how to sew a button by hand is one of the simplest and most useful skills you can pick up, and with the right technique you can reattach any flat or shank button in just a few minutes so it stays put.
Time needed: 3–5 minutes · Most common failure mode: Thread loosening or breaking · Recommended thread length: 18–24 inches (45–60 cm) · Flat button types: 3 primary types
Quick snapshot
- A thread shank (gap) is necessary for flat buttons to allow room for the buttonhole (The Art of Manliness (men’s style resource)).
- Finishing with a double knot under the button is the most secure method (Madam Sew (sewing education site)).
- Whether machine-sewn buttons are as durable as hand-sewn for all fabrics.
- Exact failure rate of buttons sewn without a shank vs. with a shank.
- Average time to sew a button by hand: 3–5 minutes.
- Button repair has been a home skill for over 100 years (since mass garment production).
- Master the basic technique, then adapt it for 4-hole, shank, and garment-specific buttons.
- Prevent future failures with secure knots and proper thread tension.
Five key facts, one pattern: flat buttons need a thread shank; shank buttons skip it.
| Label | Value |
|---|---|
| Time needed | 3–5 minutes |
| Common thread length | 18–24 inches |
| Number of passes per hole (recommended) | 3–4 times |
| Primary cause of button failure | Thread loosening or breaking |
| Most common button type | Flat 4-hole |
How to sew a button by hand for beginners?
The first button you sew sets your default technique. Learn it right here, and every button after will be faster and more secure.
Tools and materials needed
- Needle (standard sewing needle works for most buttons (Madam Sew (sewing education site))).
- Thread (polyester or cotton; double-strand for strength).
- Button (matching the original).
- Scissors.
- (Optional) Toothpick or matchstick to create a consistent shank gap (The Art of Manliness (men’s style resource)).
-
Step 1: Thread the needle and knot the end
Cut a piece of thread 18–24 inches long to avoid tangling. Double it over and tie a knot about 2 inches from the ends. Madam Sew (sewing education site) recommends a knotted, double-stranded thread for strength.
-
Step 2: Position the button on the garment
Place the button over the original stitch marks. For a new button, align it with the corresponding buttonhole. The Art of Manliness (men’s style resource) suggests first creating an anchor “X” point on the fabric to mark the spot.
-
Step 3: Create the first anchor stitch
Push the needle up from the underside of the fabric through one hole of the button. Pull the thread until the knot snugs against the fabric (The Art of Manliness (men’s style resource)).
-
Step 4: Sew through the holes and create the shank
For a 2-hole button, push the needle down through the opposite hole. Repeat 3–5 more times, according to Madam Sew (sewing education site). Before the final pass, place a toothpick between the button and fabric to create a thread shank (gap). This gap allows the buttonhole fabric to sit flush (The Art of Manliness (men’s style resource)).
-
Step 5: Secure the thread and finish
On the last repetition, bring the needle up under the button but not through the hole. Wrap the thread around the stitches under the button to form a shank, then tie a double knot close to the fabric. Trim the thread close to the knot (The Art of Manliness (men’s style resource)).
Bottom line: Beginners should focus on consistent tension and a clear shank gap. Follow these five steps and you’ll have a secure button every time.
The implication: mastering this basic sequence makes all other button types easier.
How to sew a button with 4 holes?
Four-hole buttons let you choose between a parallel or cross pattern — but the cross pattern adds extra grip at the cost of a slightly thicker thread bridge.
Sewing pattern options: parallel vs. cross
For a parallel pattern, sew across two opposite holes then repeat with the other pair. For a cross pattern, sew diagonally from hole to hole. Madam Sew (sewing education site) advises passing diagonally from the first hole to the opposite hole, then repeating 3–5 times. The Art of Manliness (men’s style resource) recommends six passes total (three per set of holes).
Creating a thread shank for thicker fabric
Even with four holes, a shank is vital. Use a toothpick or matchstick to raise the button about 1/8 inch off the fabric (The Art of Manliness (men’s style resource)). Wrap the thread around the bundle between button and fabric before knotting.
Securing the thread under the button
After the final pass, bring the needle up under the button, wrap tightly, and tie a double knot. Trim close (Madam Sew (sewing education site)).
Bottom line: Cross pattern for strength, parallel for a flatter look. Either way, a consistent shank prevents the button from being too tight.
The pattern: choose your bridge pattern based on fabric thickness and desired flatness.
How to sew a button on a shirt?
Shirt buttons see constant stress from buttoning and unbuttoning. A short, tight shank keeps the button close to the fabric but still gives the buttonhole room to move.
Aligning the button with the buttonhole
Button the shirt and mark where the button should sit. Unbutton, then position the button so it aligns perfectly with the buttonhole’s center (The Art of Manliness (men’s style resource)).
Matching thread color to the shirt fabric
Use thread that matches the shirt’s dominant color. Polyester thread is recommended for its strength and durability, according to Madam Sew (sewing education site).
Reinforcing the button for frequent use
Sew through each pair of holes 3–4 times. Use a toothpick to create a short shank (about 1/16 inch) for a dress shirt. Finish with a double knot and a dab of clear nail polish for extra security (The Art of Manliness (men’s style resource)).
Bottom line: Shirt buttons need a short shank and strong thread. A toothpick is your best friend for consistent gap height.
The catch: a short shank is critical for frequent buttoning cycles.
How to sew a button on a dress?
Delicate dress fabrics can pucker if you pull thread too tight or use a thick needle. Slow down and test your tension on a hidden seam first.
Choosing the right thread weight for dress fabric
For thin fabrics like silk or polyester, use a fine needle (size 7–9) and lightweight thread. Madam Sew (sewing education site) notes that a knotted double-stranded thread works even with fine needles if you don’t force it.
Sewing decorative vs. functional buttons
Decorative buttons can be sewn with a simpler stitch (no shank needed). Functional buttons require a strong shank. Test the button on a hidden seam first if the fabric is fragile, as advised by The Art of Manliness (men’s style resource).
Reinforcing the button on delicate fabrics
Sew through each pair of holes 3 times, then create a narrow shank. Use a fine needle and avoid pulling too tight to prevent puckering. Finish with a small knot tucked under the button (Madam Sew (sewing education site)).
Bottom line: Dress buttons demand light hands and fine tools. A narrow shank and careful tension preserve the fabric’s look.
What this means: delicate fabrics reward patience and fine tools.
How to sew a button with a loop on the back?
Shank buttons are a shortcut: no need to build a thread bridge. They’re ideal for coats and heavy fabrics where durability matters most.
Understanding shank buttons vs. flat buttons
A shank button has a built-in loop on the back. No thread shank is needed because the loop already provides space for the buttonhole (Madam Sew (sewing education site)).
Sewing a shank button directly onto fabric
Start from the back of the fabric. Push the needle through the loop on the button’s shank, then back down through the fabric. Repeat 4–5 times for a secure hold (Madam Sew (sewing education site)).
Attaching a shank button to a coat or heavy garment
Use heavy-duty thread and a sturdy needle. Sew through the shank 5 times, then tie a strong double knot on the underside. (See also The Art of Manliness (men’s style resource) for general coat button advice.)
Bottom line: Shank buttons are the fastest to sew. Focus on strong thread and multiple passes through the loop for heavy fabrics.
The upshot: shank buttons are the fastest to attach, but require strong thread for heavy coats.
Confirmed facts
- A thread shank (gap) is necessary for flat buttons to allow room for the buttonhole (The Art of Manliness).
- Using a toothpick or matchstick creates a consistent shank height (The Art of Manliness).
- Finishing with a double knot under the button is the most secure method (Madam Sew).
- Polyester thread is recommended for its strength and durability (Madam Sew).
What’s unclear
- Whether sewing machine button attachment is as durable as hand sewing for all fabric types.
- The exact failure rate of buttons sewn without a shank vs. with a shank.
“Create an anchor ‘X’ point on the fabric before positioning the button.”
— The Art of Manliness (men’s style resource)
“For shank buttons, the needle must pass through the shank beneath the button rather than through holes in the button face.”
— Madam Sew (sewing education site)
For everyone who has ever lost a button at an awkward moment, the decision is clear: spend five minutes now to learn this technique, or keep chasing buttons across the floor. A secure button isn’t magic — it’s just good sewing.
For those who prefer a slightly different technique, the tutorial on sewing on a button provides clear instructions.
Frequently asked questions
Can I sew a button with a sewing machine?
Yes, but hand sewing gives better control over tension and shank height. Machine sewing can work for flat buttons with a button foot, but it is less durable for heavy fabrics (Madam Sew (sewing education site)).
What is the best thread for sewing on buttons?
Polyester thread is strongest and most durable. Cotton thread is fine for light shirts. Always use a double strand for extra strength (Madam Sew (sewing education site)).
How do I tie off a button stitch so it doesn’t come undone?
After wrapping the shank, pass the needle through the loop before pulling tight to lock the stitch. Tie a double knot as close to the fabric as possible, then trim (The Art of Manliness (men’s style resource)).
How do I sew a button on a coat or heavy jacket?
Use heavy-duty thread and a stronger needle. For shank buttons, sew through the loop 5 times. For flat buttons, create a thicker shank (about 1/4 inch) to accommodate the coat’s thick fabric (Madam Sew (sewing education site)).
Can I use glue instead of sewing a button?
Fabric glue can work temporarily, but it is less durable and can damage delicate fabrics. Sewing remains the most secure and reversible method.
How do I replace a missing button when I don’t have an exact match?
Use a similar-sized button from a hidden part of the garment (e.g., inside the placket). If that’s not possible, replace all buttons on that row with matching buttons from a set.
What is the correct spacing between button and fabric (shank height)?
For a shirt, about 1/16 inch (the thickness of a toothpick). For a dress or coat, 1/8–1/4 inch. The shank should be just enough to let the buttonhole fabric sit flat (The Art of Manliness (men’s style resource)).
More related posts
 Best Washer and Dryer Set for the Money in Ireland
 St. Louis Cardinals vs Phillies Match Player Stats: May 14
 Current Events in the World: Latest News & Headlines Today
 When Does the NFL Draft Start – 2025 Schedule in Green Bay
 Best Snow Tubing Near Me: Find Local Hills, Prices & Family Fun
 AD Love Is Blind: Baby, Marriage, and Clay Rejection
 Where Is Melania Trump From? Birthplace, Nationality, Life
 Days of the Week in Spanish: Pronunciation Guide & Memory Tips